Step By Step: The Fool-Proof Perfect Smoked Brisket Recipe
May 30, 2022
 Certified Piedmontese Competition Cut Brisket
What is a smoked brisket?
Beef brisket is one of the nine beef primal cuts. It's derived from the breast or lower chest of beef. The brisket muscles include the superficial and deep pectorals and contain a significant amount of connective tissue, resulting in an astounding leanness that might give you pause. Many cooking methods have been used to tenderize the brisket, such as slow roasting or braising. It's cooked differently everywhere, but in the United States, brisket smoked low-and-slow is the largest jewel in the crown of Texas barbecue. By smoking the brisket with indirect heat at a very low temperature for twelve hours or more, the fat and meat have enough time to render and cook, transforming the tough cut into ingenious, succulent smoked meat rich with flavor.
The brisket is a notoriously tricky cut to master. To get into the nitty-gritty of smoking the perfect brisket, we picked the brains of our resident BBQ Expert, Todd Finner (who also happens to be the Information Systems Manager at Certified Piedmontese).
"The trick with the brisket is that they are largely considered the snowflakes of the beef cuts, and very rarely are two briskets alike."
A Master Checklist for Smoking the Perfect Brisket
- Get a perfectly trimmed brisket
- Season your brisket
- Prepare the smoker and heat it to 225-250 °F
- Smoke your brisket for 2 hours
- Baste your brisket every hour after the 2-hour mark
- Wrap your brisket when it reaches 160-170 °F
- Continue smoking until your brisket reaches 205 °F
- Rest your brisket before slicing and serving
Most briskets require lots of prep work from the consumer when bought directly from the source. This Competition Cut Brisket is already cut, trimmed, and ready to be cooked, saving you time, energy, and waste.
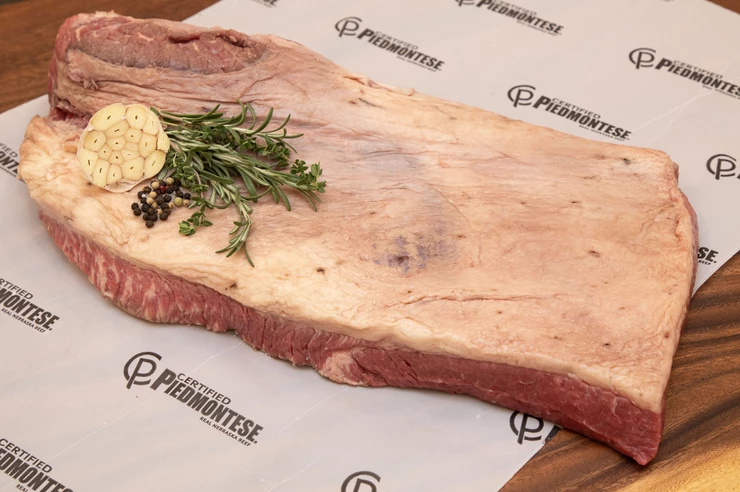
Gathering insights from many other barbecue professionals and enthusiasts, we expertly shape the sides and trim the surface fat to turn the brisket into something more aerodynamic. Through shaping the sides, face, and point into the unique competition cut, the meat is opened up to allow a good flow of smoke over and around it during the cooking process, and it is left with the perfect amount of fat to let the meat stay moist and tender. The deciding factor for the flavor of your brisket is consistency. Getting a consistently sized brisket like the Certified Piedmontese Competition Cut Brisket can help you get better results over time as you experiment.
How to smoke the perfect brisket?
Step 1 – Season the meat
While most of the flavor of the brisket will come from the meat itself and the smoke, you still want to be sure that the seasoning is on point. Your choice for rub can include a number of spices, such as paprika, salt, pepper, garlic, onion, mustard powder, and brown sugar. “An always reliable rub is the Texas Style Rub, which is a simple blend of kosher salt and coarse black pepper to enhance the taste of beef,” Todd pointed out. "My personal preference is a blend of different styles: I like using a typical Kansas City Rub that has some sweetness combined with added salt, garlic, and pepper."
Those who prefer their brisket even leaner can further trim the fat separating the point and the flat before applying the dry rub. A binder such as olive oil, yellow mustard, or barbecue sauce can be used for the dry rub, but it's not a necessity. The binder only acts as a sticking agent and, in some cases, may change the texture of the bark (crust) but would not interfere with the taste – you won't be able to pick it up on the meat after it's finished cooking. The dry rub can be applied right before smoking or let sit to marinate in the fridge for up to 24 hours. If refrigerated, let the brisket warm up to room temperature for an hour before smoking for a more even cook.
"Ensure you get a nice, even covering of dry rub on the brisket, but don't overdo it. You want the beef to stand out, not the rub," says Todd, "1 tbsp of dry rub per pound of meat is a good rule to follow. You'd want to get all areas, especially the edges that are most vulnerable to the heat, and the rub acts as protection. You are cooking for an extended period with a decent amount of heat, so be mindful that certain ingredients like the sugars in the rub or mop can burn."
Step 2 – Prepare the smoker
Once your brisket is ready, it's time to start the smoker. Heat up until the temperature is between 225 °F and 250 °F. Whether using a classic offset smoker, a charcoal grill with indirect heat, or a pellet smoker, the basic elements remain the same: indirect heat, wood smoke, and time.
You could be using an electric smoker, but Todd himself can't recommend lump charcoal enough. "When using charcoal, once you have a nice bed of coals covered with white-gray ash, go ahead and add your wood." For the wood choice, which wood to use depends on the intended result. Mesquite has a deeper, smoky flavor, while applewood brings a mild sweetness, and hickory is highly versatile. "For my briskets, I prefer an oak and hickory blend that produces a medium smoky flavor."
Wood Types for Smoking
Apple
Provides a sweet and mild fruitiness. Great by itself or mixing with another type of wood.
Cherry
Offers a hint of fruitiness to the beef. Great by itself or mixing with another type of wood.
Hickory
Provides a savory sweetness that adds hearty flavor to the beef. A popular wood choice due to its strong flavor.
Maple
Gives the meat a light, sweet, and mild smokiness. Great by itself or mixing with another type of wood.
Mesquite
Gives a hefty smoky flavor and is particularly suited for cooking smaller cuts of meat over a shorter period. Typically burns hotter than other woods.
Oak
Has a more subtle flavor suited for cooking larger cuts without being too overpowering. A popular choice of wood.
Pecan
Provides a rich and nutty flavor to the beef that leans toward the sweeter side. Great by itself or mixing with another type of wood.
Step 3 – Smoking the brisket
When your smoker is ready, place your brisket on your smoker. There are discussions to be had on whether to place the meat fat side-up or fat side-down, but we recommend placing it fat side-up, unless your heat source comes from directly below the meat, then place it fat side-down to protect the muscle from drying out too much. The point side of the brisket should be placed closer to the heat source, while the flat side should be facing away from the heat source. The fatty layer on the point acts as protection against burning, and all the fat would be rendered down easily.
If your heat source is directly below the meat, use a drip pan to prevent flare-ups and avoid producing too much smoke that would lead to a bitter taste. Prepare a source of moisture, such as a water pan, to help keep moisture in the meat and prevent the bark from burning.
Managing the temperature is the hardest part of smoking a brisket. Avoid opening the smoker's lid any more than you must so it can remain at a consistent temperature between 225 °F and 250 °F. Todd draws on his personal experience, "I tend to leave my brisket alone for the first 2 hours before checking on it with a squirt bottle or basting mop every hour after that."
Mop Sauce Blend
You should be continuously basting the brisket every hour with mop sauce to eliminate any burning or drying out that may occur on certain spots of the meat. A few common mop sauce blends are listed here:
- Apple cider vinegar + water (1:1 ratio)
- Apple juice + water (1:1 ratio)
- Beef broth + Worcestershire sauce (2:1 ratio)
Checking the Temperature
At the 4-hour mark, probe your meat with a thermometer.
Todd recommends wireless thermometers that can be kept in the meat or even wired ones that can be left next to the smoker. "I like to probe one thermometer in the flat and one in the point. The wireless thermometers allow me to monitor the progress of the brisket without opening the lid." If you only have one thermometer, the best place to probe is right in the middle of the densest part of the flat, inserted horizontally and angled across the grain. Make sure to not get the probe in the fat layer between the flat and point, as it won’t give an accurate reading.
The Brisket Stall Period
Around the 4 to 5-hour mark, you might notice that your brisket's internal temperature is no longer going up. "Don't panic," said Todd. "This is called the brisket stall. It happens when evaporation from the brisket's surface halts the cooking process. For Certified Piedmontese brisket, the brisket stall happens even sooner and lasts longer as it contains less intramuscular fat and shorter muscle fibers. There isn't as much work required to break down the brisket." During this time, the stall will help set the bark on the brisket. The stall may also overlap with the next step.
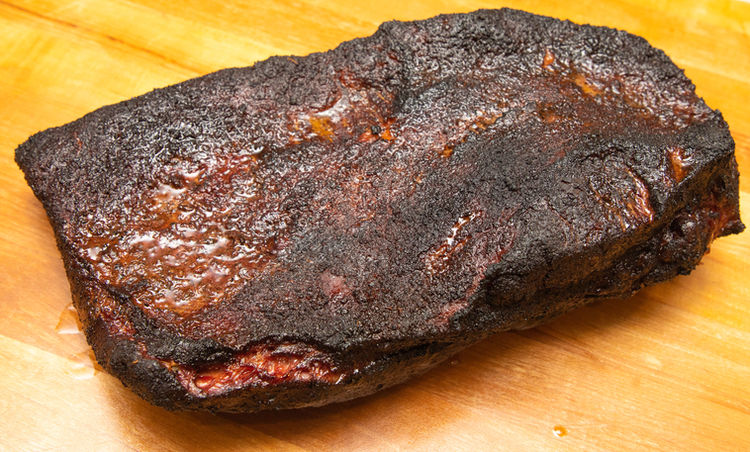
Step 4 – Wrapping the Brisket
When your brisket reaches an internal temperature between 160 °F and 170 °F, it should be the perfect time to wrap your brisket. According to Todd, "I feel there's a point where you can 'over-smoke' the meat and create a sour taste. 5 to 6 hours should have given an adequate amount of time to achieve a good level of smoke ring and bark on the meat. At this point, you should have a firmly set dark bark, and the meat itself should have a little wiggle to it."
Wrapping the brisket helps it cook faster as you eliminate the air into which moisture can evaporate. Your brisket would win the brisket stall battle easily, causing the temperature of the meat to rise again. The wrap also locks in the delicious flavor and tenderizing juices of the beef. Some barbeque enthusiasts wrap their brisket to control the final appearance of the bark. When the bark reaches the desired color and thickness, wrapping it would preserve the "perfect" bark.
Still, to-wrap or not-to-wrap the brisket is a contentious topic. Some argue that a wrapped brisket would have a moistened and less crispy bark. When left unwrapped, the brisket cooks slower and takes on more smoke, creating a thicker, drier bark on its exterior.
Options for Wrapping
Aluminum Foil
Wrap 2 layers of foil crossways and fold them in tightly. Aluminum foil wrap results in a softer bark and a rich, beefy flavor, with the shortest cook time.
Butcher Paper
It takes some practice to wrap the brisket with butcher paper. It would result in a slightly longer cook time, with more crunch to the bark and a heavier smoky flavor.
Roaster Pan (and foil cover)
Using a roaster pan and covering the brisket with foil makes it easier to move off the smoker and collect the meat's juices. Remember to add some moisture such as beef broth, apple cider, or any liquid of your choice to the pan.
Step 5 – Finish cooking your brisket
After wrapping, re-probe the brisket by poking the thermometer through the wrap – a tiny hole won't affect the cooking time. Return the brisket to the smoker. The brisket will continue to cook for about 4 to 6 hours. A good gauge for the overall cooking time is around an hour and 15 minutes for every 1lb of beef. Your brisket is done when it reaches an internal temperature of 205 °F. Remove from the heat and leave it on a platter or cutting board to rest. "The thermometer probe should slide in and out of the brisket with little resistance. If you feel a little give, try to check the temperature in a different area to verify and cook a little longer if needed."
There you have it: A perfectly smoked brisket!
"You can experiment with different things, whether it's mops, rubs, wood, binders, or injections. Even if your first try isn't perfect, don't be discouraged. Not all pieces of meat are created equal, and the science of barbecue takes practice."
Resting the Brisket
Rest your Certified Piedmontese brisket for 45 minutes to an hour until its internal temperature lowers to between 170 °F and 180 °F.
Resting the meat allows the moisture that has risen to its surface to redistribute within the fibers and spread across the meat, making every bite juicy and tender. It prevents the thickened juices from escaping from the meat when you slice into it, making it easier to handle and saving you from cleaning up a mess.
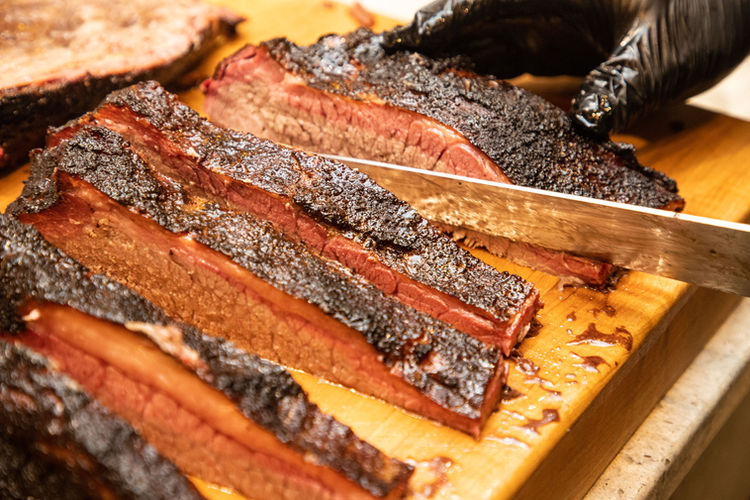
Step 6 - Time to Serve!
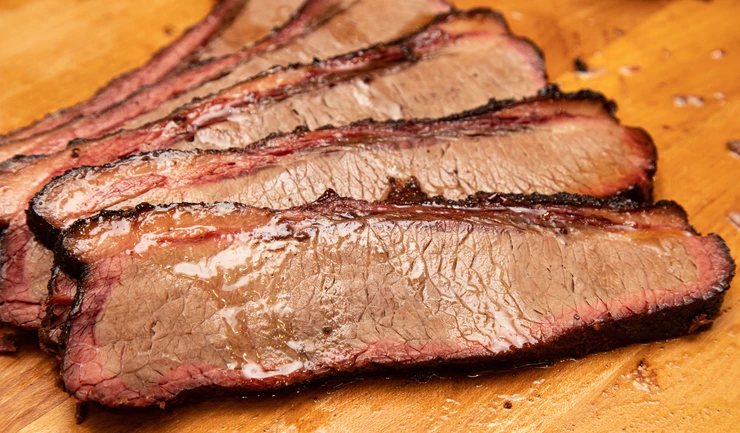
If you just plan on slicing the brisket, methodically cut into the flat end against the grain until you reach the point. After that, turn the point 90° and continue slicing against the grain. Or you could first separate the flat from the point, then slice against the grain for both parts.
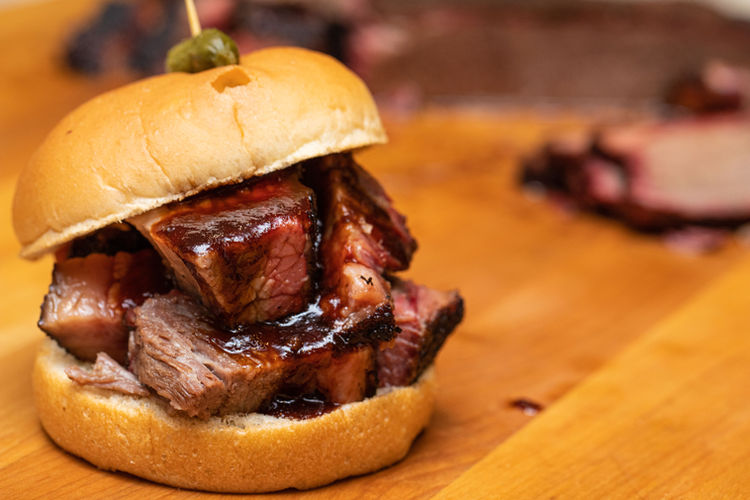
Todd has a lot to say about how you can serve your smoked brisket. "A brisket can be more than just slices, though. A good cleaver can allow you to chop portions of the flat and point for some chopped beef. You can also separate the point and the flat, then make slices of the flat and make burnt ends from the point.
"You can cube up the point and make burnt ends on the spot, or for a more traditional route, you cube them, add some sauce and more rub before putting the cubed point back on the smoker for another hour or two in a foil pan until the sauce and rub really start to adhere to the meat."
Remember to practice safe food handling. Cut up what you will be eating immediately and leave the rest whole to be reheated later.
Reheating a Brisket
You can use an oven to reheat leftover brisket. Preheat the oven to 325 °F. Let the (refrigerated) brisket warm to room temperature. Place the brisket in a roaster pan, adding some leftover juices or beef broth to prevent your brisket from drying out. Cover it with foil, and make sure you crimp the foil tight around the edges before placing it in the oven. A whole leftover brisket should take about 1 hour to be reheated and about 20 to 30 minutes if it is sliced. Your reheated brisket would be almost as good as fresh off the smoker!
The sky's the limit for what you can do with smoked brisket. It can be served on its own -luscious, gelatinous parts with plenty of moist, juicy, umami-filled goodness- or as part of a sandwich. If you have leftover brisket, the sky's the limit for what you can do with them!
Brisket Mac & Cheese, Brisket Street Tacos, Brisket Hash & Eggs, etc.
The beef brisket is a time-honored tradition of American culinary heritage, and the possibilities of this barbecue cut are endless!
"One of my personal favorite professional pitmasters is Aaron Franklin, the owner of the world-famous Franklin Barbecue restaurant. His books and videos are a great resource for anyone wanting to learn more about barbecue. Much of what I have learned and the passion for barbeque has come from cooking with family and friends. We spend a lot of time sharing tips and tricks and trying out new things."